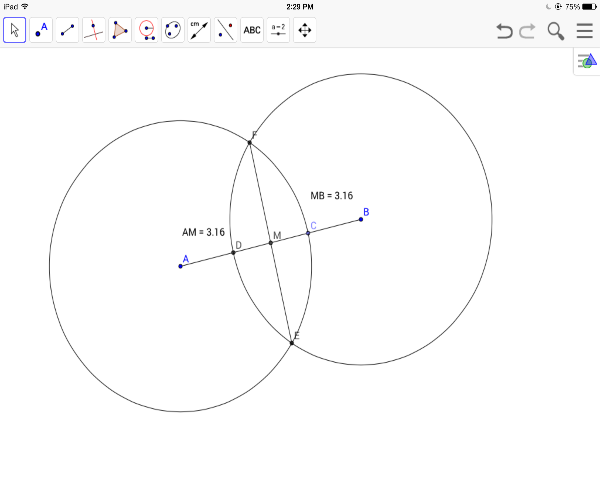
Bisect a segment
Segment Bisector Steps
Any segment, line or plane that intersects a segment at its midpoint is called a segment bisector.
Step 1: Use the "point" tool to create two separate points labeled A and B.
Step 2: Use the "segment" tool to connect point A and B by selecting each point.
Step 3: Create a point between A and B that is closer to B than A. Label the new point C.
Step 4: Use the "compass" to connect the endpoint A to C. To do so, select point A, then point C, then point A to mark center of the circle.
Step 5: Repeat step 4 and select points A, C, then B to mark the center of the circle. You should now have two circles where the original endpoints A and B are the center of the circle. Your circles should intersect.
Step 6: Use the "point" tool to select the intersections between the two circles (points D and E).
Step 7: Create a "segment" connecting the intersections. You have now bisected the segment!
Step 8: Use the "point tool" to add a point F to the intersection of segment AB and the segment created in step 7 (midpoint).
Step 9: Measure segment AF and segment FB using the "angle tool", "measure distance" by selecting points A and F and then again by selecting points F and B. The measurements should be equal.
Step 10: Write your name using the "ABC" tool.
Step 11: Copy the image and place in your google doc.
Example Construction

Example Construction
